Build Your Private AI Screenshot Organizer with LMStudio
Organize Screenshots with Local Multimodal LLMs, No Cloud Needed
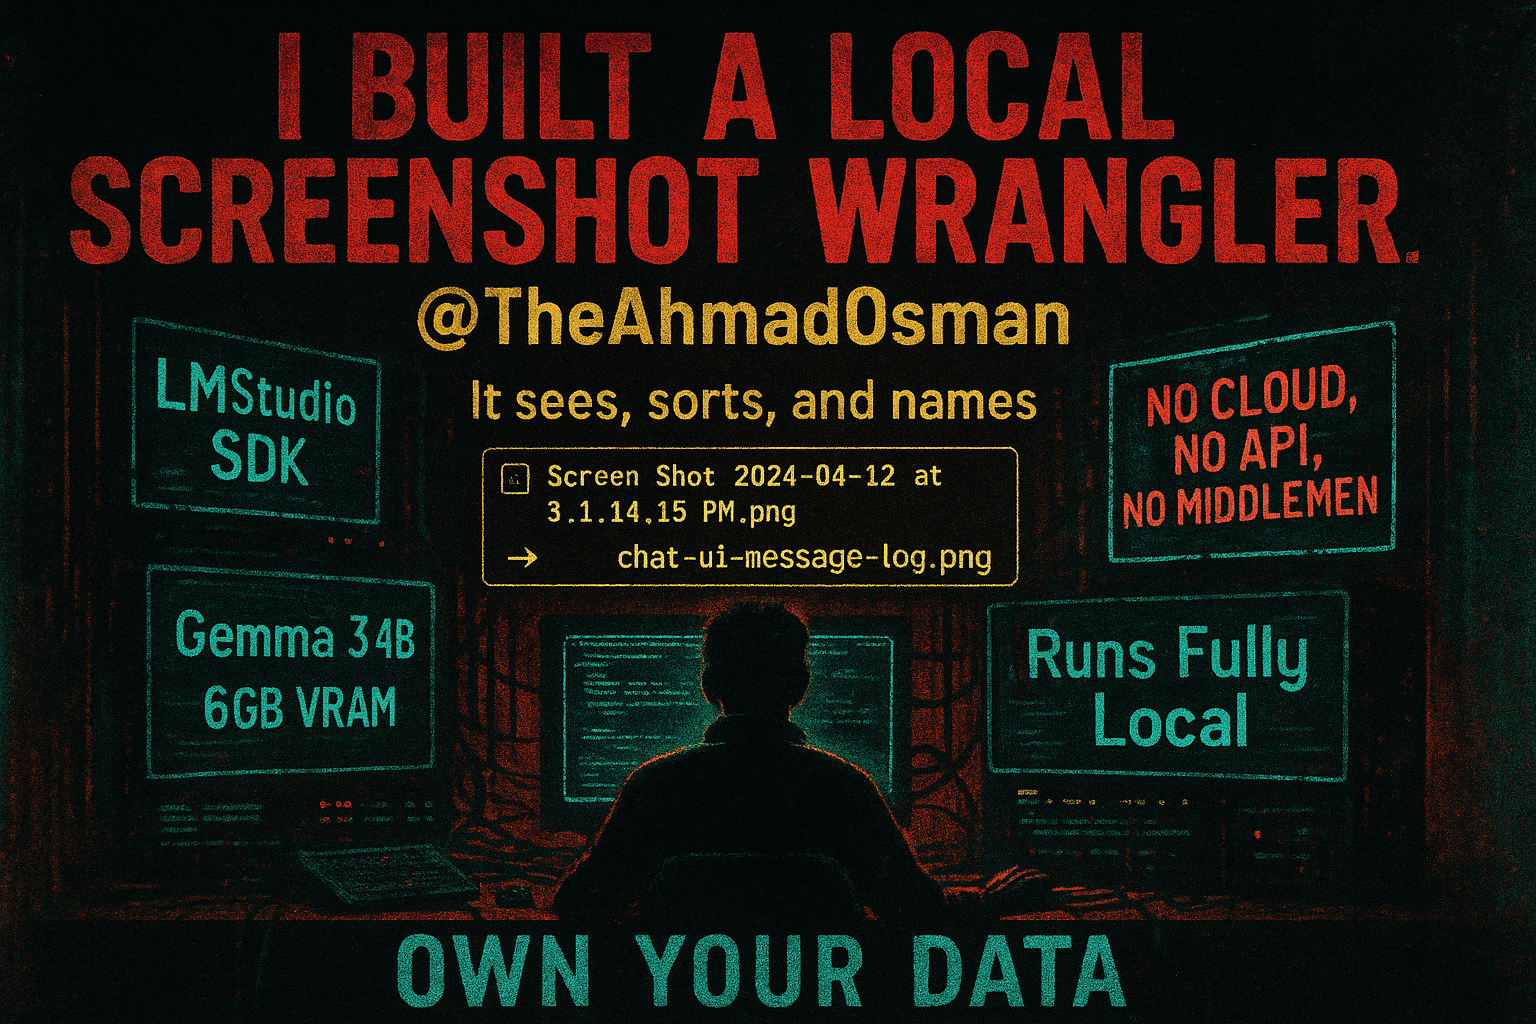
Table of Contents
Build Your Private AI Screenshot Organizer with LMStudio (Runs Fully Local)
This blogpost was published on my X/Twitter account on April 22nd, 2025 .
I run an AI screenshot organizer locally from my PC. I don’t want to send my screenshots anywhere on the internet; my data is mine, and sending it to any proprietary model means I am giving away the rights to it. So, I have a local VLM pipeline that organizes all my screenshots, this pipeline was previously powered by my 14x RTX 3090s Basement AI Server and now is running directly from my PC with LMStudio SDK and occupying less than 6GB of GPU VRAM.
Recently LMStudio released their Python and Javascript SDKs . LMStudio is my go-to LLM desktop application , especially for models running directly on my PC and not AI Cluster. I have been intending to give their Python SDK a try with a small project, and the release of Gemma 3 new 4-bit quantization made me pull the trigger.
Given that Gemma 3 is a multimodal that accepts both image and text as input (4B, 12B, and 27B; 1B is text only), and the wild size (and performance) that the QAT quantization makes the model sit at, I decided to rewrite my screenshots organizer to run directly from my PC.
This article starts off slow, but it ramps up and gets way more interesting as we go. If you’d rather jump straight into the action, feel free to skip ahead to the Prerequisites section. And yep, this works on pretty much any image, not just screenshots.
The Backstory and The Folder Full of Chaos
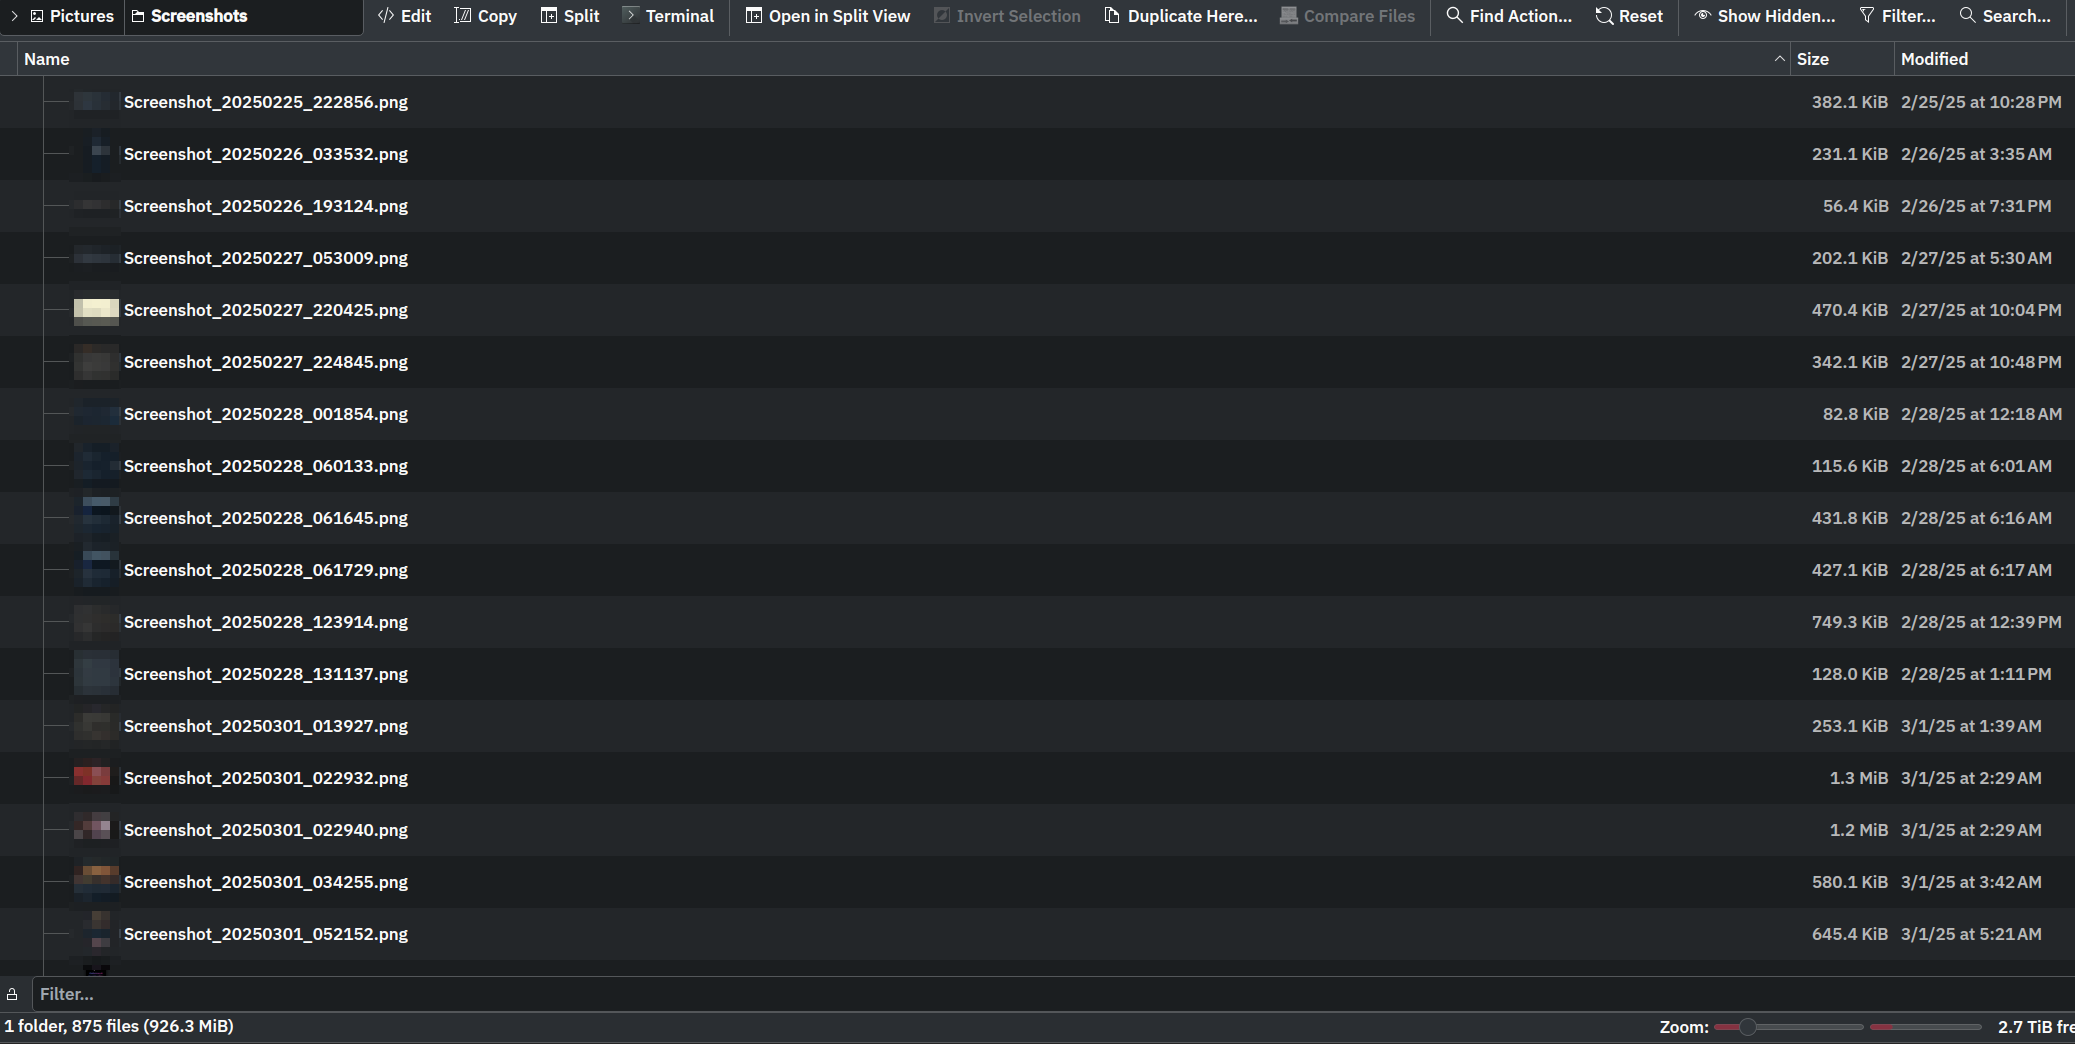
I hate a desktop littered with screenshots named Screenshot 2024-05-15 at 11.23.45 AM.png, Screen Shot 2024-05-16 at 9.01.12.png, or even worse, Untitled.png. The screenshots folder used to be where things went to die unless I use them right away. And then, sometimes, I find myself wondering about that one screenshot from 4 months ago!
When Qwen2-VL came out last year, I built an asynchronous pipeline that ran on my AI cluster to automatically rename, categorize, and organize my screenshots based on their content. Given my atypical use of my AI cluster, that pipeline didn’t run frequently, and I much preferred to run it from my PC directly; but I also didn’t want to replicate the complex software configuration on my PC. You can learn more about how I use my AI cluster in this blogpost . Again, LMStudio simplifies these processes on my PC, one-stop shop for ai models kind of thing, and I already have enough headaches to add more to it; so, ultimately, I ran this pipeline from my AI cluster every few weeks once the screenshots mess bothered me enough to go around remembering how to get the pipeline up and running.
In this post, we’ll build a practical screenshot organizer step-by-step, and in parallel we’ll get introduced to the core functionalities of the lmstudio-python library.
What We’re Building
We’ll create a Python script that:
- Scans a specified directory for screenshot files (PNG, JPG, etc.).
- Extracts the date and time from the filename (if present).
- Uses a locally running multimodal LLM (Gemma 3 4B) via LMStudio to analyze the content of each screenshot.
- Asks the LLM to generate a concise, filesystem-safe description (a “slug”) and a relevant category (e.g.,
code,ui,chat). - Renames the screenshot using the generated slug and the original date.
- Moves the renamed file into a subdirectory named after the generated category.
By the end, you’ll have a useful tool and a solid understanding of how to connect to LMStudio, load models, process images, and get responses using the new LMStudio Python SDK.
Prerequisites
You want to download LMStudio
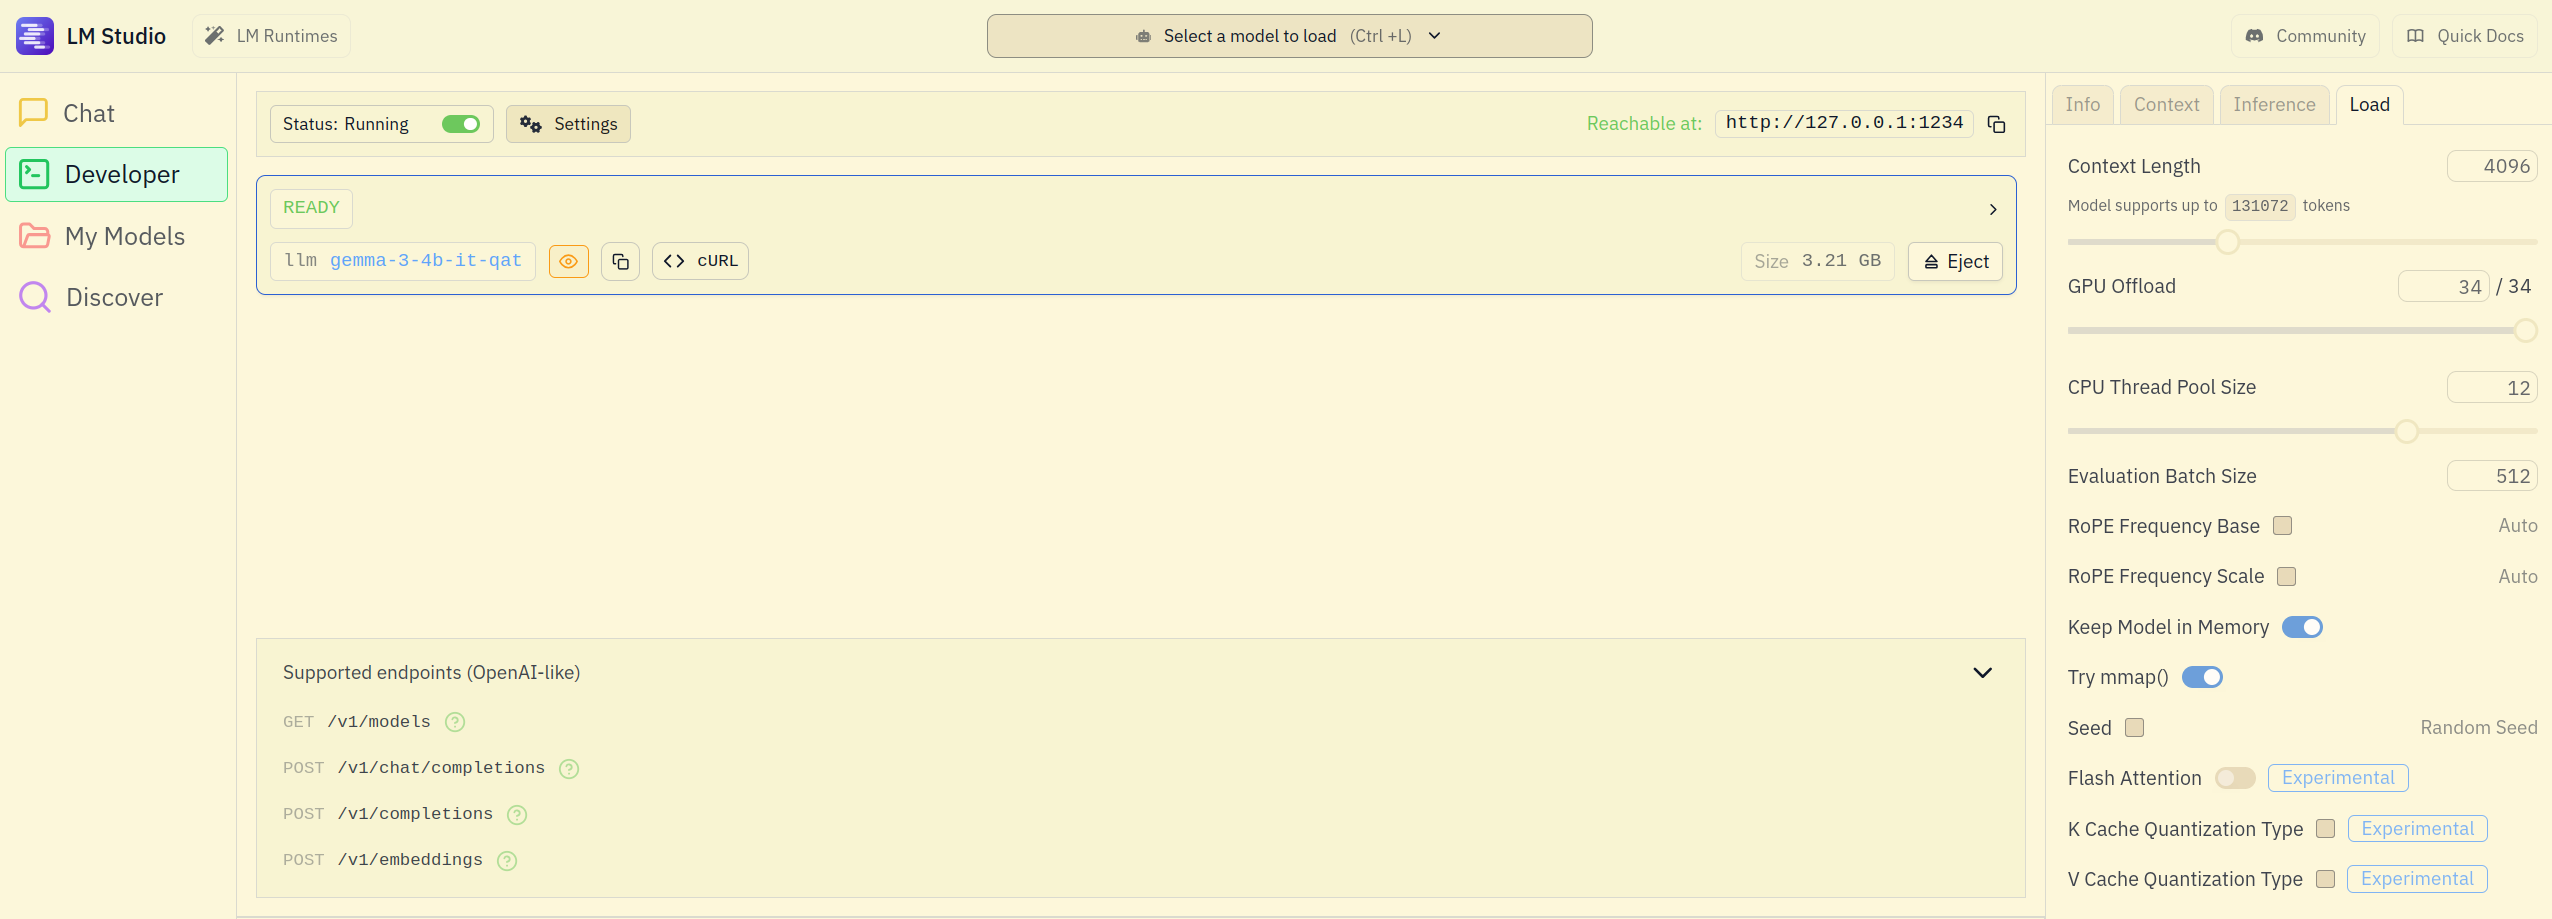
, setup LMStudio to work in Developer’s mode, and download Gemma 3 4B GGUF. I download my models directly from LMStudio as can be seen here
. The screenshot below shows my Developer tab serving gemma-3-4b-it-qat on http://127.0.0.1:1234. It also shows you the context length I am using, among other settings. These settings should work for you if your GPU has ~6GB of VRAM free.
From here, you’ll want to set up your Python virtual environment. I use uv, but you can stick with pip if that’s your preference. Anything that installs from PyPI works.
Using uv (recommended):
uv venv .venv
source .venv/bin/activate
uv pip install lmstudio
Using pip:
python -m venv .venv
source .venv/bin/activate
pip install lmstudio
Either route gets you a clean environment with lmstudio installed and ready to go.
Assumptions Moving Forward:
- You have LMStudio installed and running in Developer mode.
- You have Python 3.10 or newer installed.
- You have run
pip install lmstudio(or have the SDK files in yourPYTHONPATH). - You have loaded the
gemma-3-4b-it-qatmodel in LMStudio Developer tab. - The LMStudio server is running on the default
http://localhost:1234. If not, you’ll need to addlms.get_default_client("http://your-address:port")at the beginning of script or configure the client explicitly.
Now let’s dive into the code part by part. (The full script is available at the end of this post).
Imports and Configuration
import argparse
import json
import logging
import re
import unicodedata
from pathlib import Path
from typing import Optional, Tuple

# <<< The star of the show! >>>
import lmstudio

# --- Configuration ---
logging.basicConfig(
    level=logging.INFO, format="%(asctime)s - %(levelname)s - %(message)s"
)
# Regex to find date/time patterns
DATE_PATTERN = re.compile(
    r"(\d{4}[-_]?\d{2}[-_]?\d{2}[_T -]?\d{2}[-_:]?\d{2}[-_:]?\d{2})"
)
ALLOWED_EXTENSIONS = {".png", ".jpg", ".jpeg", ".webp", ".bmp", ".gif"}
DEFAULT_CATEGORY = "uncategorized"
MAX_SLUG_LENGTH = 60
MAX_CATEGORY_LENGTH = 30
We start with standard library imports and our key import: lmstudio. We also define some constants: logging setup, a regular expression to find timestamps in filenames (crucial for sorting later), allowed image extensions, and default names/limits.
Helper Functions
The script includes a few helper functions:
extract_date_string(filename): Uses theDATE_PATTERNregex to pull a timestamp likeYYYY-MM-DD-HH-MM-SSfrom a filename.sanitize_filename_part(text, max_length, is_category): Cleans up text (like the LLM’s suggested slug or category) to make it safe for use in filenames and directory names (lowercase, hyphens for spaces, removes weird characters, truncates).parse_llm_response(response_content): Tries to parse the LLM’s response, expecting JSON withslugandcategorykeys. It includes robust fallbacks if the LLM doesn’t return perfect JSON.
These are important for the script’s functionality but don’t directly use the lmstudio SDK, so we won’t dive deep into their implementation here. I simply ported my old script over as-is. If this article gains enough interest, I might actually follow up with a second one that updates this script or another one of my tools to use Structured Outputs and proper Tool Calling which the LMStudio SDK support.
Connecting to LMStudio
The process_directory function is where we first interact with the SDK to set up our connection to the running LMStudio server and load the desired model.
def process_directory(directory: str, model_identifier: str, dry_run: bool = False):
    # ... (directory path checks) ...

    try:
        # Initialize the actual client
        # Assumes LMStudio is running on http://localhost:1234
        logging.info("Connecting to LMStudio...")
        client = lmstudio.Client() # Add base_url if needed

        # Get the model handle using the identifier provided
        logging.info(f"Getting model handle for: {model_identifier}")
        # This doesn't necessarily load the model fully into memory yet,
        # but gets a reference to it.
        llm = client.llm.model(model_identifier)

        # Use the identifier returned by the library if available (might be normalized/different model)
        actual_identifier = getattr(llm, "identifier", model_identifier)
        logging.info(f"Using model: {actual_identifier}")

    except Exception as e:
        logging.error(f"Failed to connect to LMStudio or get model: {e}")
        # Log specific guidance for common connection errors if needed
        if "Connection refused" in str(e):
             logging.error("Is LMStudio running and the server started?")
        return

    # ... (rest of the function iterates through files) ...
client = lmstudio.Client(): This is the entry point to the SDK. It creates a client object that will manage communication with the LMStudio server. By default, it assumes the server is running athttp://localhost:1234. If your server is elsewhere, you can pass theapi_hostargument:lmstudio.Client(api_host='http://your_server_ip:port').llm = client.llm.model(model_identifier): Once we have a client, we access the LLM functionalities viaclient.llm. The.model()method takes the model identifier (the same name you see in LMStudio, e.g.,'gemma-3-4b-it-qat') and returns a handle (llm) representing that specific model loaded on the server. We’ll use this handle later to interact with the model.
Processing a Single Screenshot
The process_screenshot function does the heavy lifting for each screenshot file, heavily utilizing the SDK.
def process_screenshot(
    screenshot_path: Path,
    llm: lmstudio.LLM,      # Pass the model handle
    client: lmstudio.Client, # Pass the client
    dry_run: bool = False,
) -> Tuple[bool, str]:

    # ... (Initial checks: file exists, extension, extract date) ...
    logging.info(f"Processing '{original_filename}'...")

    try:
        # 1. Prepare image for the model using the SDK client
        logging.debug(f"Preparing image '{screenshot_path}'...")
        image_handle = client.prepare_image(screenshot_path)
        logging.debug("Image prepared successfully.")

        # 2. Define the System Prompt for the LLM
        system_prompt = (
            # ... (Detailed instructions for the LLM - see full script) ...
            # Tells the LLM to analyze the image and output JSON
            # with "slug" and "category" fields.
        )

        # 3. Create a Chat object with the system prompt
        chat = lmstudio.Chat(system_prompt)

        # 4. Prepare the user message (Image + Text Instruction)
        # Use TextData for structured text input (string fallback included)
        try:
            text_data = lmstudio.TextData(
                text="Analyze this screenshot and provide the JSON output as instructed."
            )
        except AttributeError: # Fallback for older SDK versions maybe?
             logging.debug("lmstudio.TextData not found, passing raw string.")
             text_data = "Analyze this screenshot and provide the JSON output."

        # Add the user message containing *both* the prepared image and the text
        chat.add_user_message([image_handle, text_data])

        # 5. Get the LLM's response using the model handle
        logging.debug("Querying LLM for slug and category...")
        # This is the core prediction call!
        # Feel free to increase the temperature for more creative results.
        response = llm.respond(chat, config={"max_tokens": 100, "temperature": 0.1})
        # Receive response
        logging.debug(f"LLM Response raw: '{response.content}'")

        # 6. Parse the LLM response (using our helper function)
        raw_slug_text, raw_category_text = parse_llm_response(response.content)

        # 7. Sanitize the slug and category (using our helper function)
        slug = sanitize_filename_part(raw_slug_text, max_length=MAX_SLUG_LENGTH)
        category_slug = sanitize_filename_part(raw_category_text, max_length=MAX_CATEGORY_LENGTH, is_category=True)
        # ... (Refine slug if needed) ...
        logging.info(f"Sanitized: slug='{slug}', category='{category_slug}'")

        # 8. Construct new filename and path
        # ... (Uses slug, date_str, category_slug) ...

        # 9. Handle potential filename collisions
        # ... (Adds -1, -2, etc. if filename exists) ...

        # 10. Create directory and move file (or log if dry_run)
        if dry_run:
            # ... Log proposed actions ...
        else:
            # ... Create directory target_dir_path.mkdir(...) ...
            # ... Move file screenshot_path.rename(new_path) ...
        return True, final_message

    # ... (Error handling) ...
Let’s focus on the SDK interactions here:
image_handle = client.prepare_image(screenshot_path): Before sending an image to the LLM, we need to prepare it. Theclient.prepare_image()method takes the path to the image file and uploads it to the LMStudio server, returning aFileHandleobject. This handle acts as a reference to the uploaded image that the LLM can understand.chat = lmstudio.Chat(system_prompt): We use thelmstudio.Chatobject to manage the conversation history with the LLM. We initialize it with our carefully craftedsystem_promptwhich instructs the LLM on its task (analyze the image, output JSON).text_data = lmstudio.TextData(...): While you can often pass plain strings, usingTextDataallows for more structured input if needed in other scenarios. Here, it wraps our simple instruction text. The code includes a fallback to a plain string just in case.chat.add_user_message([image_handle, text_data]): This is key for multimodal input. We add a single user message to the chat history, but its content is a list containing both theimage_handle(the reference to our uploaded screenshot) and thetext_data(our instruction). The LLM receives these together.response = llm.respond(chat, config={...}): This is the moment of truth! We call the.respond()method on ourllmmodel handle, passing in thechatobject (which contains the system prompt and our multimodal user message). We can also pass optionalconfigparameters likemax_tokensandtemperatureto control the generation. The SDK handles sending this to the LMStudio server and waiting for the response. Tweaking thetemperaturesetting adjusts how predictable or creative the output is: higher values make it more creative and random, while lower values make it more focused and deterministic.response.content: The result of the.respond()call is anPredictionResultobject. We access the textual content generated by the LLM using the.contentattribute. Ourparse_llm_responsehelper then takes over to extract the slug and category from this content.
The rest of the function deals with standard Python file operations (parsing, sanitizing, checking for collisions, creating directories, renaming/moving files) based on the LLM’s output.
Running the Organizer
The script uses argparse to create a command-line interface. To run it:
Full Script: screenshot_organizer.py
- Save the full script above as
screenshot_organizer.py. - Open your terminal.
- Make sure LMStudio is running with the multimodal model loaded, and is serving the model to local network.
- Navigate to the directory containing the script.
- Run the script, providing the path to your screenshots directory and the model identifier.
# Example: Dry run first to see what would happen
python screenshot_organizer.py /path/to/your/screenshots -m "gemma-3-4b-it-qat" -n

# Example: Actual run (remove -n or --dry-run)
python screenshot_organizer.py /path/to/your/screenshots -m "gemma-3-4b-it-qat"

# Example: With verbose logging for debugging
python screenshot_organizer.py /path/to/your/screenshots -m "gemma-3-4b-it-qat" -v
Replace /path/to/your/screenshots with the actual path and "gemma-3-4b-it-qat" with the identifier of the multimodal model you have loaded in LMStudio.
Why the SDK Matters?
Could you do this by making raw HTTP requests to the LMStudio API? Yes, but it would be much more complex. You’d need to handle:
- Handling image encoding and upload details.
- Manually constructing JSON payloads.
- Managing websocket connections for streaming.
- Parsing complex responses.
- Managing authentication tokens (if applicable in future API versions).
The lmstudio SDK abstracts all this away, providing a very clean interface:
- Simple client initialization (
lmstudio.Client()). - Easy model access (
client.llm.model(...)). - Straightforward image handling (
client.prepare_image(...)). - Intuitive chat management (
lmstudio.Chat,chat.add_user_message). - Direct response generation (
llm.respond(...)).
Conclusion
We’ve built a genuinely useful tool, a smart screenshot organizer, while exploring the core features of the new LMStudio SDK. The SDK makes it pretty easy to connect to the backend (LMStudio), load a model, prepare and send image data, structure a chat, and get a response from a local LLM, all within a Python script.
I had similar results to the 4B model with the 12B and 27B sizes of the Gemma 3 model, and that’s why I opted for the 4B model for this article. It runs under 6GB of VRAM, which makes it a lot more accessible for devs running on consumer hardware and hopefully useful to a wider crowd.
What could I have done differently? For one, I could’ve used Structured Output from the start, leveraging the LMStudio SDK’s Tool Calling functionalities. Instead, I simply ported my old script over as-is. But if this article gains enough interest, I might actually follow up with a second one that updates this script, or another one of my tools, to use Structured Outputs and proper Tool Calling.
Go ahead, try out the screenshot organizer, adapt it to your needs, and start exploring what you can build by integrating local LLMs into your projects with the LMStudio SDK.
Few More Words on The SDK
The SDK is clean, well-structured, and surprisingly easy to dive into (I really wanted to say “delve into,” but I’m trying to make sure this doesn’t sound like an AI wrote it. Honestly, I’m most heartbroken about the em dashes—I loved those things. Now I can’t use them without sounding like an AI slop. Curse you, GPT.).
I even dug into the source code , it’s impressively well-engineered.
Beyond basic inference, the LMStudio SDK supports Multi-turn Chat, Streamed Completions, and Tool Calling via .act(). You can fully manage models: load, configure, unload, tweak GPU usage, context length, and auto-unload settings. It also handles Embeddings, Tokenization, Speculative Decoding, Model Introspection, Structured Outputs, and apply Prompt Templates per model.
Cheers.
P.S. If this was your first time coming across me , you should take a look at my website . It’s mainly technical posts on AI & Infra. Also, I got an About Me page that I think is a fun read.